How to update drive firmware when using Storage Spaces
I’m currently building a storage solution based on Windows Storage Spaces. I’m using Seagate Enterprise SAS and SSD drives. It’s best practise to install the latest firmware before configuring storage spaces. But what if you have a running setup and there’s a critical firmware update available? Storage Spaces hides the physical drives as the drives are part of the pool on which the virtual disks are created. It’s similar to a traditional RAID solution where accesss to the physical drive is not possible. With traditional RAID solutions however the vendor usually provides a method for upgrading drive firmware while the system is running. Storage Spaces doesn’t have this feature. Most likely because the underlaying hardware can be from different vendors making it hard to create this kind of feature in Storage Spaces. Of course there’s the option of bringing down the system and booting with a DOS or Linux distribution but what you really want is a way to accomplish this without any downtime. In this post I will explain how I did this with my setup using Seagate drives.
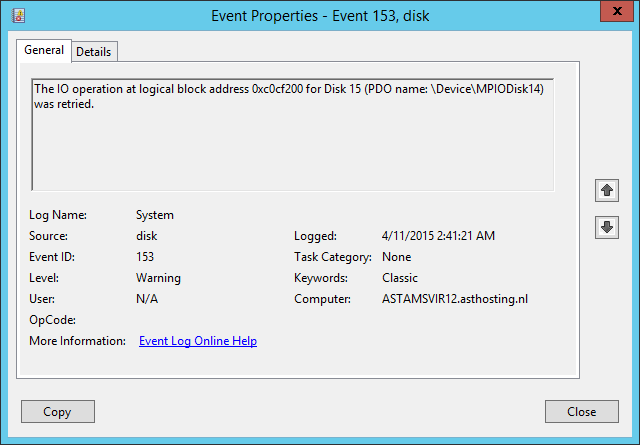
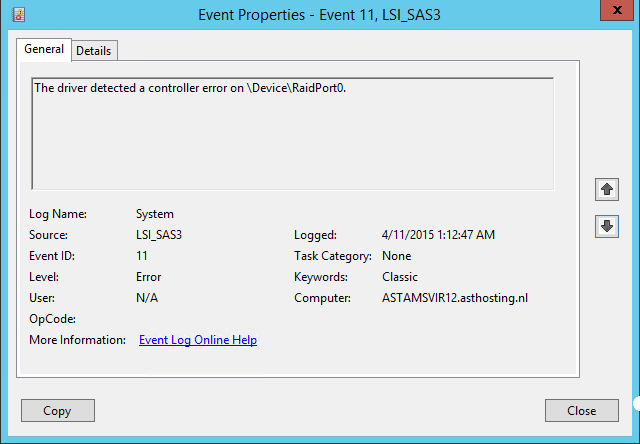
I am using 7 Seagate 1200 200GB SSD drives in combination with 10 Seagate Enterprise 4TB SAS drives to create a tiered storage solution using Storage Spaces. Currently I’m running a 2 node Windows 2012 R2 cluster with a SuperMicro JBOD. Each cluster node has dual 12Gb SAS links to the JBOD. Windows MPIO is enabled to allow multipath IO. Storage Spaces is configured and a tiered virtual disk has been created. The SSD drives are currently on firmware 0005. The drives have been certified for Storage Spaces and are listed in the Windows Catalog. However the certification is for firmware version 0006! At night when the optimization process runs that places hot data on SSD drives I am seeing errors on the LSI SAS controller as well as disk IO errors indicating a problem with the SSD drives:
In order to make the drive visible in the Disk Management and to the firmware update utility (Seatools for Seagate drives) the drive needs to be removed from the storage space. This can be done with minimal risk providing the storage pool has sufficient free space and drives to move the data from the affected drive to other drives within the pool. There are some rules to follow when designing a storage spaces solution:
Create a pool with one less column than the maximum. I have 6 SSD drives and a 3 column mirrored pool which is the maximum and not recommended! To overcome this issue I added a 7th SSD drive to the pool to allow drives to be removed one by one.
Per enclosure you need to have free space equivalent to one drive + 8GB in order to succesfully repair virtual disks in case of a drive failure. In tiered pools this is one drive + 8GB for each drive type.
For more information read the following article on the MS website: Replace Failed Disks and Repair JBODs for Storage Spaces in Windows Server
The Storage Spaces Survival Guide blog is also very useful when working with Storage Spaces.
Procedure
First we want to know the status of the Storage Pool and if all is good. This can be done in Server Manager. There’s also a script on Technet which gives you an nice overview of the status and configuration:
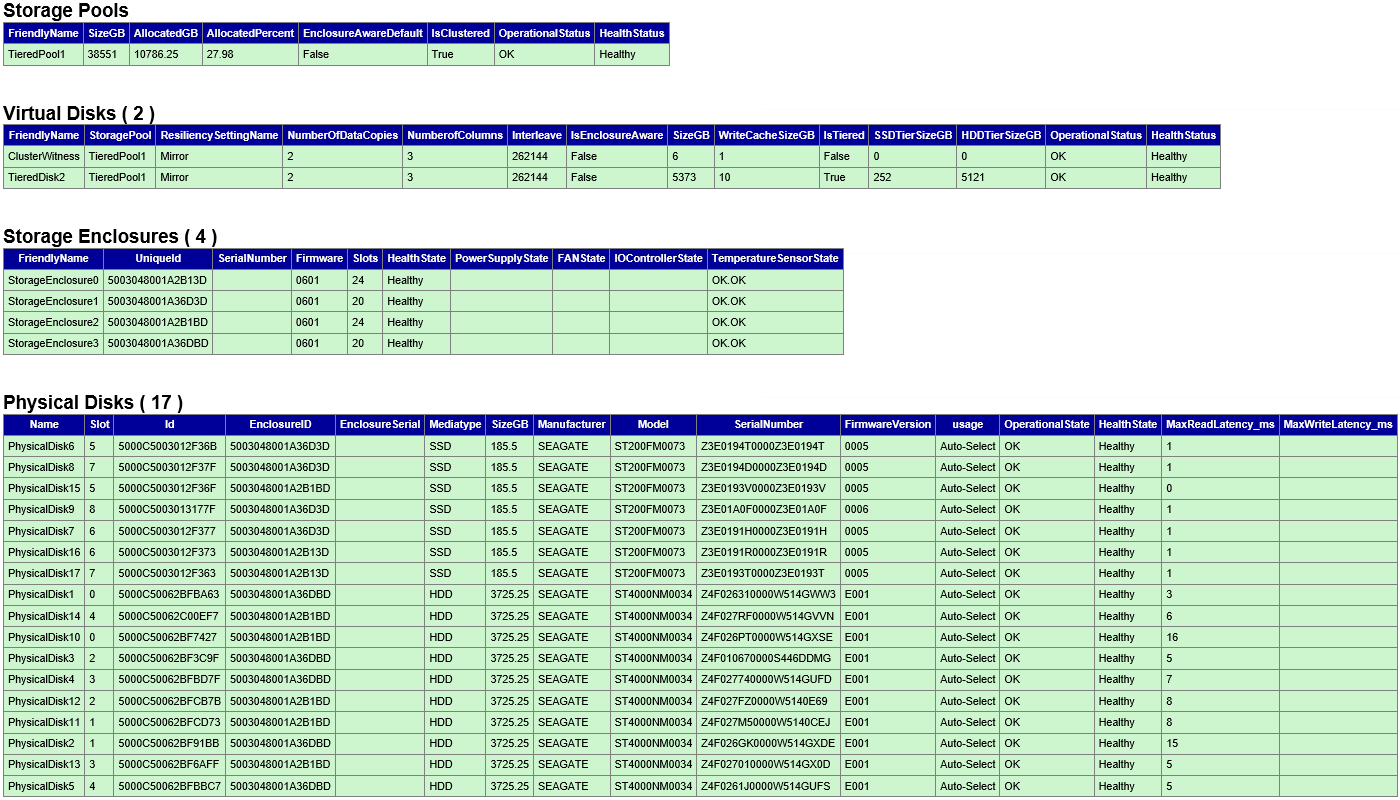
In this overview we can also identify the drives that need the new firmware.
Get a copy of the script here.
Now that we know the status of the pool we can proceed with removing a drive. In order to be able to remove a drive safely the drive needs to be Retired first and the vritual disks will have to be healthy again.
Set the usage type of the drive to retired using PowerShell:

Repair the virtual disks:
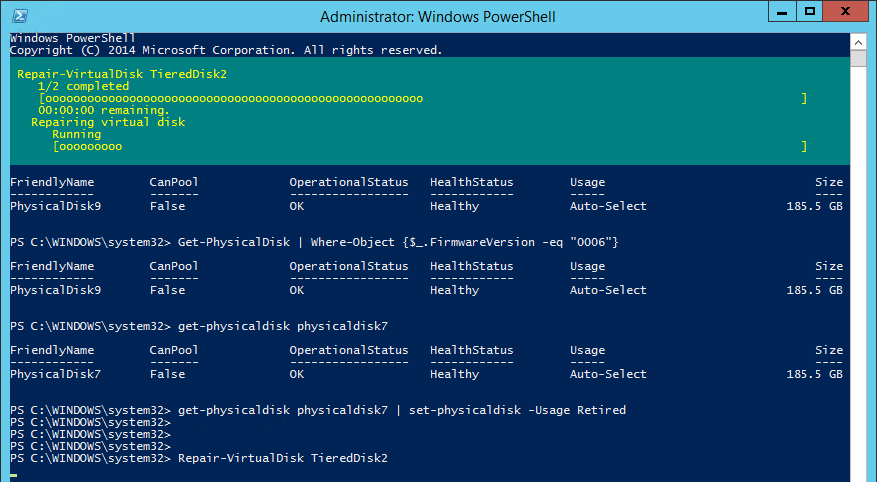
Confirm the virtual disks are healthy and the drive is retired:

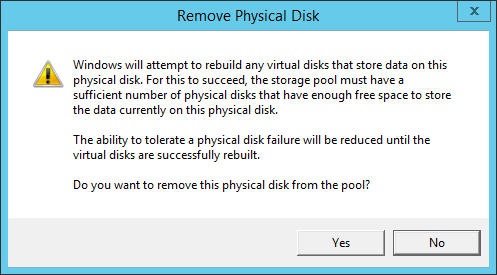
Remove the drive from the pool:
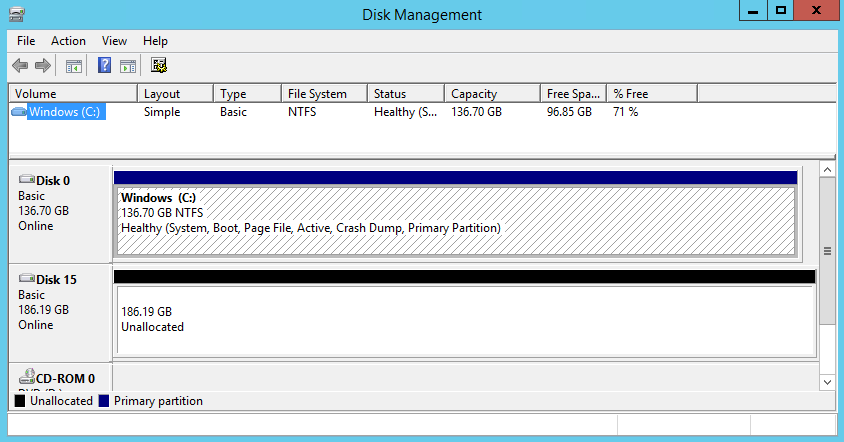
The drive is no longer part of the storage pool and now visible in the Disk Management:
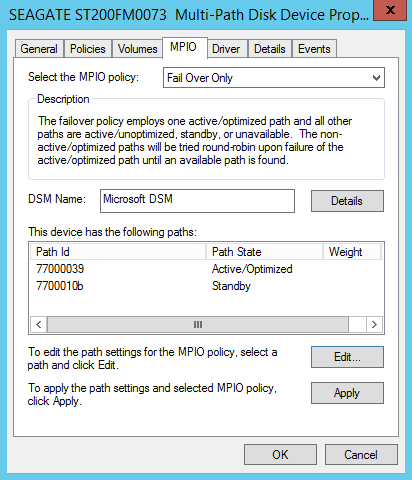
The firmware update utility for Seagate drives Seatools doesn’t like MPIO enabled disks. The firmware update fails with MPIO enabled with the following error:
Sense Key: 0x05 Sense Code: 0x2C Sense Qual: 0x00 FRU: 0x00
I have looked up the meaning of this error on the following website: http://www.stix.id.au/wiki/SCSI_Sense_Data
Sense Code 0x2C Sense Qual: 0x00 means COMMAND SEQUENCE ERROR
This is caused by MPIO in load balancing mode.
We need to set MPIO to failover only so that only one path is used:
Now we are ready to perform the firmware upgrade:
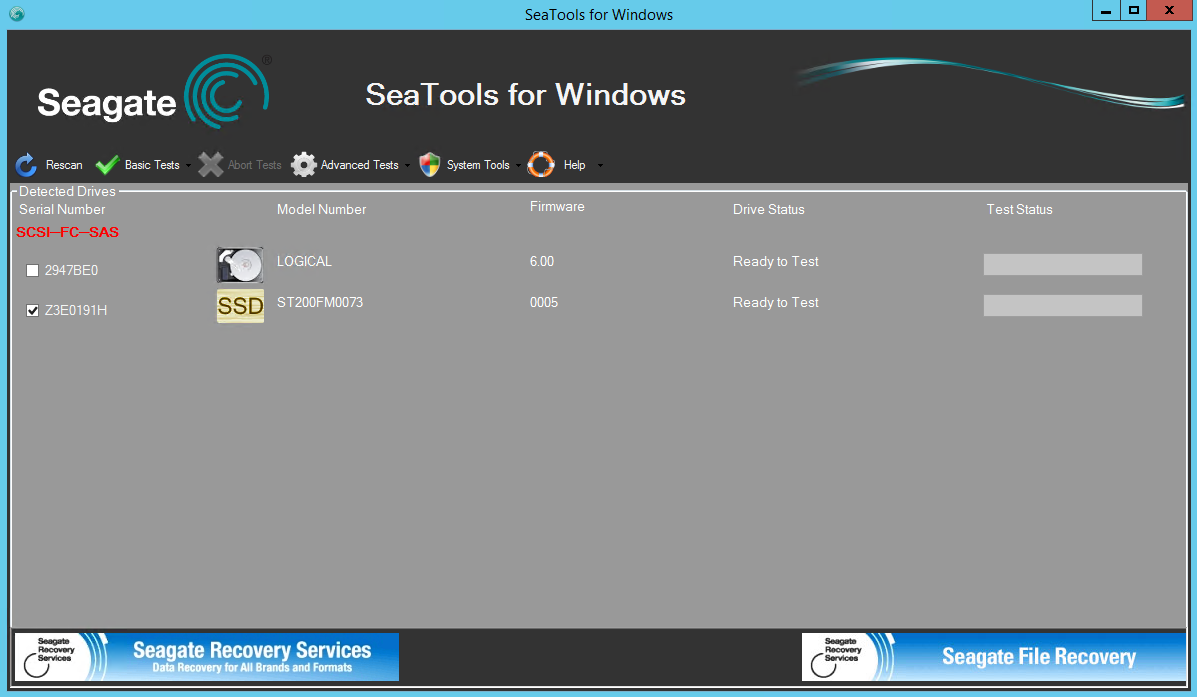
Seatools can see the disk and the firmware is still 0005. Please note that Seatools runs in Admin mode. You need to place the formware file in the program files directory of Seatools or the update will fail!
After the firmware is succesfully downloaded to the drive perform a Rescan. Confirm that the firmware is updated:

Now we can enable MPIO again and add the drive back into the Storage Pool.
We can continue this process until all drives are done and at the same firmware level. There’s some risk involved doing it this way as the virtual disks need to be repaired. During this repair process the data is not mirrored. However the repair process is fast and only takes a couple of minutes. I prefer this than having to bring down the entire storage cluster and using other offline methods for upgrading the firmware. This method causes no downtime and provides a safe alternative to other methods. Of course if you use a three way mirror there is even less risk involved as there’s still 2 copies of the data available while doing the firmware upgrade.
Now I have to wait and see if the firmware upgrade has solved the issues. I will write an update as soon as I know more.
Hi Stefan,
We experaince the same problems with the seagate’s SSD’s.
Currently we are testing with HGST’s because the new firmware for the seagate’s was not much better.
Would be nice the exchange some information to have a better case with Seagate.
Regards,
Jeroen Bosman
My problems disappeared after upgrading to firmware verion 0006. However I haven’t re-enabled deduplication yet which was often causing the errors on the Seagate drives. I will send you an e-mail with more information.